

Step-by-Step Process for Digitizing Embroidery Designs Successfully
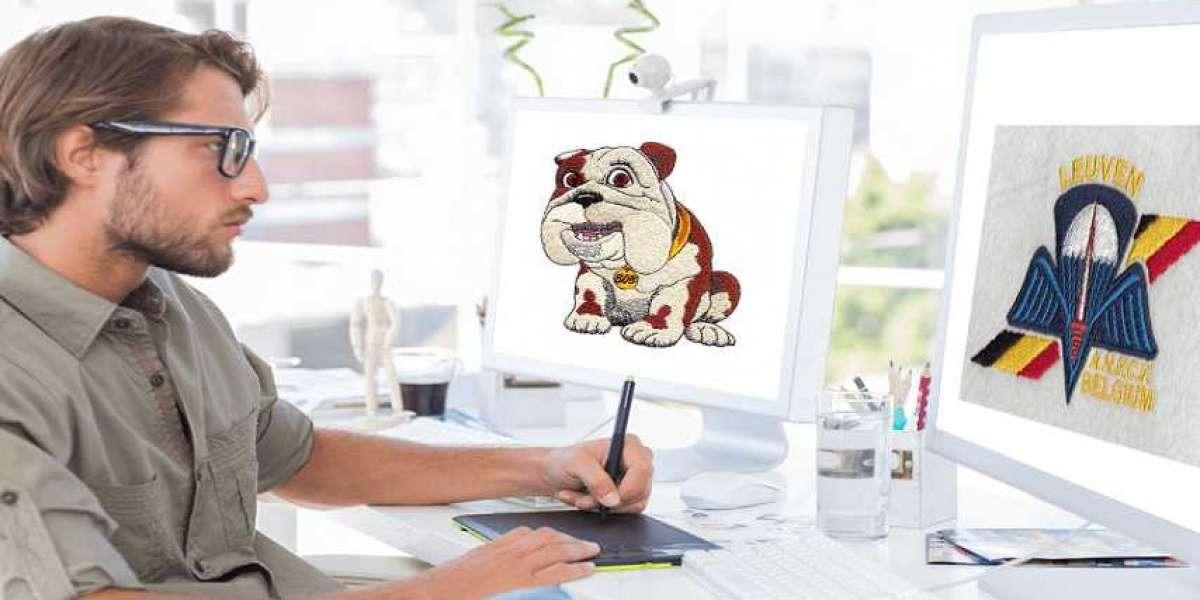
You have a design ready to become embroidery. Maybe it is a logo for your business, a custom illustration, or a special gift. You know the final result you want, but the path from flat artwork to dimensional stitches can feel mysterious. Digitizing is that path. Understanding the step-by-step process for Digitizing Embroidery Designs gives you the confidence to create files that stitch cleanly, run smoothly, and produce professional results.
Digitizing is the bridge between your artwork and your embroidery machine. It involves making hundreds of deliberate decisions about stitch types, densities, underlay, compensation, and paths. Each step builds on the one before. Follow this process, and your designs will stitch perfectly.
Let me walk you through the complete workflow.
Step 1: Prepare Your Artwork
The quality of your final embroidery starts with the quality of your source artwork. Never skip this step.
Vector files are ideal. AI, EPS, or SVG files contain mathematical paths that scale infinitely without losing quality. They have clean edges that digitizing software can interpret accurately. If you have vector artwork from a graphic designer, you have the best possible starting point.
If you only have raster images (JPG, PNG), use the highest resolution available. Aim for at least 300 DPI at your final stitch size. Lower resolution forces the digitizer to guess at details, and guesses lead to blurry embroidery.
Clean up your artwork. Remove stray pixels. Simplify overlapping shapes. Merge elements that should stitch as one object. Reduce colors to a manageable number. The cleaner your source, the cleaner your stitches.
Step 2: Analyze Your Design
Before you digitize a single stitch, study your design. Identify what makes it unique and must be preserved. Spot potential trouble spots like small text that might fill in, fine lines that might disappear, or gradients that need simplification.
Ask questions: Where will this design appear? On what fabric? At what size? What machine will stitch it? Your answers guide every decision that follows.
Step 3: Set Up Your Software
Open your digitizing software and create a new document. Set your workspace to the final stitch dimensions. Left chest logos typically run 3 to 4 inches wide. Hat fronts run about 2.2 inches tall by 4.5 inches wide. Jacket backs go larger.
Set your hoop size. Choose the hoop that matches your machine and placement. This ensures your design fits within the available stitching area.
Import your artwork. Place your image as a reference layer. Lock it so you do not accidentally move it.
Step 4: Create Objects
In digitizing software, you work with objects, not just stitches. Each element of your design becomes a separate object with its own properties.
Trace each element using the software's drawing tools. Create separate objects for text, borders, fills, and fine details.
Name your objects. "Text", "Border", "Background" — clear names help you navigate complex designs.
Group related objects. Keep layers organized. This makes editing easier later.
Step 5: Assign Stitch Types
Different parts of your design need different stitch types. Choose intentionally.
Satin stitches for borders, text, and narrow columns up to about 12mm wide. They create smooth, shiny edges that define shapes clearly. For letters and outlines, satin is often the choice.
Fill stitches (tatami) for large solid areas. They create a textured surface that looks consistent from a distance. Use fills for backgrounds and large shapes.
Running stitches for fine lines, details, and underlay. They provide structure without adding bulk.
Specialty stitches like bean stitches or triple runs for elements that need emphasis.
Step 6: Set Stitch Angles
Stitch direction affects how light reflects off your design and how it interacts with fabric grain. Plan angles intentionally.
For text: Stitches run perpendicular to letter strokes for clean edges.
For fills: Vary angles between layers for structural stability.
For borders: Perpendicular to the edge for clean definition.
For curved elements: Contour stitching follows the natural flow.
Alternating angles between layers creates a plywood effect that prevents distortion.
Step 7: Add Underlay
Underlay is the hidden foundation of professional embroidery. It goes down first, stabilizing fabric and creating a smooth base. Never skip it.
Edge run underlay follows outlines, preventing edges from sinking. Use for stable wovens.
Center run underlay runs back and forth across fill areas. Use for stretchy knits.
Zigzag underlay provides maximum stability. Use for difficult materials like fleece.
For caps: Specialized underlay accounts for the curve.
Step 8: Calibrate Density
Stitch density controls coverage and feel. Balance these factors for your fabric.
For light fabrics: Slightly higher density prevents show-through.
For heavy fabrics: Lower density prevents stiffness.
For stretchy knits: Density that allows movement without distortion.
Start with standard settings: 0.4-0.5mm between stitches for fills. Test and adjust based on results.
Step 9: Apply Pull Compensation
Thread tension pulls fabric together during stitching. Without compensation, your design stitches smaller than intended.
For stretchy fabrics: Higher compensation (0.3-0.4mm)
For stable fabrics: Lower compensation (0.1-0.2mm)
For satin stitches: Compensation is especially critical
Compensation widens certain areas so that after pulling, they end up the correct size.
Step 10: Optimize Stitch Path
The order in which your machine stitches affects production time and quality.
Plan color sequence. Group similar colors together. Stitch small details first, then larger areas. Minimize thread changes.
Optimize stitch path. Connect areas that can stitch continuously. Minimize trims and jumps. When jumps are necessary, make them as short as possible.
Use your software's stitch player to watch the design sew in sequence. Look for inefficiencies. Adjust the path.
Step 11: Add Tie-Ins and Tie-Offs
Tie-ins secure the beginning of a stitch sequence, preventing thread from pulling out. Tie-offs secure the end, preventing unraveling.
Place them strategically. Hide small anchor stitches under other stitching or along edges where they will not show.
Manage jump stitches. Long jumps across open areas create loose threads. Strategic trims minimize this risk.
Step 12: Preview and Simulate
Before exporting, use your software's simulation tools to review your work.
Watch the stitch sequence. Look for inefficiencies, registration issues, or unexpected behavior.
Check density visually. Does coverage look even? Are there areas that appear too dense or too light?
Verify registration. Do all colors align properly? Are there any gaps or overlaps?
Make adjustments. If you spot problems, go back to the relevant step and fix them.
Step 13: Export Your File
When your design is perfect, export it in the format your machine needs.
For commercial machines: DST
For Brother/Babylock: PES
For Melco: EXP
For Pfaff/Viking: VP3/VP4
For Janome: JEF
Save your working file in the software's native format (EMB, .HATCH, etc.) as your master. This preserves all your design intelligence for future edits.
Step 14: Test Stitch
This step is not optional. Never run production without testing.
Test on actual fabric. Use the same material, stabilizer, needles, and thread you will use in production.
Test at production speed. A file that works at slow speeds may fail at full speed.
Inspect thoroughly. Check tension, registration, density, and overall appearance. Measure dimensions to verify pull compensation.
If anything looks wrong, go back to your master file, make adjustments, and test again. Repeat until perfect.
Step 15: Document Your Work
Good documentation saves time on future orders.
Record thread colors. Note which thread brands and color numbers you used.
Document settings. Keep notes on underlay, density, and compensation that worked for each fabric.
Save your files. Organize your master and machine files with clear naming conventions. Back them up to cloud storage and local drives.
When to Get Professional Help
Even with this step-by-step process, some designs benefit from professional expertise. Complex logos with fine details, rush orders, or unfamiliar fabrics may justify outsourcing.
Professional digitizing services like Absolute Digitizing, Digitizing Buddy, Cool Embroidery Design, and Absolute Digitizer have teams of experienced digitizers who follow these steps every day. They deliver files that stitch perfectly, saving you time and ensuring quality.
Conclusion
Digitizing embroidery designs successfully requires a systematic approach. Prepare your artwork. Analyze your design. Set up your software. Create objects. Assign stitch types. Set stitch angles. Add underlay. Calibrate density. Apply pull compensation. Optimize stitch paths. Add tie-ins. Preview and simulate. Export your file. Test thoroughly. Document your work.
Each step builds on the one before. Skip any, and quality suffers. Follow all, and your designs emerge as beautiful embroidery that represents your brand with pride.
Whether you digitize yourself or partner with professionals, this process ensures your files stitch cleanly, run smoothly, and produce professional results. Your embroidery deserves that level of care. Start your next project with confidence.