

How to Get Smooth and Professional Stitch Results
Getting clean embroidery is not hard. But it needs the right steps. Many people face rough stitches, gaps, and broken threads. This happens when the base work is not done well. A machine can only follow what you give it.
To get smooth results, you must focus on Digitizing for embroidery in the right way. This step tells the machine how to stitch each part of the design. But before that, your design must be clean, simple, and ready to stitch.
Why Smooth Stitching Matters
Good stitching makes your work look professional.
Benefits of Smooth Stitching
-
Clean and neat look
-
Strong design on fabric
-
Better customer trust
Problems with Poor Stitching
-
Uneven lines
-
Loose threads
-
Bad finish
Smooth work always stands out.
Start with a Clean Design
Your design is your base.
What You Need
-
Sharp lines
-
Clear shapes
-
High-quality image
What to Avoid
-
Blurry images
-
Pixel edges
-
Too many small parts
A clean design gives better results.
Keep Your Design Simple
Simple designs stitch better.
Why Simplicity Works
-
Easy for machine
-
Less thread breaks
-
Faster stitching
Tips to Simplify
Remove Tiny Details
Small parts may not show well.
Use Bold Lines
Thin lines may break.
Limit Text
Small text is hard to read.
Clean the Artwork Properly
Cleaning your design is very important.
Steps to Clean
-
Remove extra parts
-
Smooth edges
-
Fix rough lines
Tools You Can Use
-
Editing tools
-
Design software
Clean artwork gives clean stitching.
Choose the Right Colors
Colors must be clear and simple.
Color Tips
-
Use solid colors
-
Avoid too many shades
-
Keep strong contrast
Why It Matters
Too many colors increase thread changes.
Use the Right File Format
Your machine needs the correct format.
Common Formats
-
DST
-
PES
-
JEF
Why It Matters
Wrong file will not work.
Use Vector Artwork
Vector files give better quality.
Benefits
-
Smooth lines
-
Easy resize
-
Clean shapes
Common Formats
-
AI
-
SVG
-
EPS
Vector artwork improves stitching.
Understand Stitch Types
Each part needs the right stitch.
Main Stitch Types
Satin Stitch
Best for text and borders.
Fill Stitch
Used for large areas.
Running Stitch
Good for thin lines.
Right stitch type gives smooth results.
Set Stitch Density Correctly
Density controls how close stitches are.
What to Know
-
High density = thick design
-
Low density = gaps
Best Tip
Keep balance for neat results.
Use Underlay for Support
Underlay is a base layer.
Why It Helps
-
Holds fabric
-
Supports stitches
-
Keeps shape
Types
-
Edge run
-
Zigzag
-
Fill base
Underlay improves final quality.
Match Design with Fabric
Fabric type matters a lot.
Common Fabrics
-
Cotton
-
Polyester
-
Stretch
Tips
-
Use stabilizer
-
Adjust stitch type
-
Test on same fabric
Each fabric needs care.
Use Stabilizers Properly
Stabilizers keep fabric firm.
Types
-
Cut-away
-
Tear-away
-
Wash-away
How to Choose
-
Stretch = cut-away
-
Strong fabric = tear-away
-
Light design = wash-away
Stabilizers reduce movement.
Adjust Machine Settings
Machine setup is key.
Important Settings
-
Thread tension
-
Speed
-
Needle
Tips
-
Do not stitch too fast
-
Check thread
-
Use correct needle
Good settings give smooth stitching.
Always Test Your Design
Testing is very important.
Why Testing Helps
-
Finds errors
-
Saves time
-
Improves quality
How to Test
-
Use scrap fabric
-
Check lines
-
Look for gaps
Never skip testing.
Common Mistakes to Avoid
Avoid these errors.
Mistakes List
-
Poor design quality
-
Too much detail
-
Wrong stitch type
-
No stabilizer
-
No test
Fix these to improve your work.
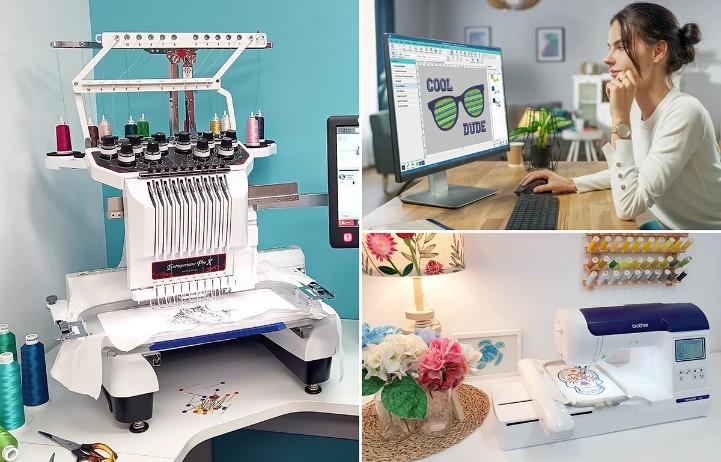
Tools That Help You
You need simple tools.
Basic Tools
-
Editing software
-
Digitizing software
-
Embroidery machine
Popular Software
-
Wilcom
-
Hatch
-
Brother PE-Design
These tools make your work easy.
Real Experience Tips
From real work, small steps matter.
Tip 1: Start Clean
Fix your design first.
Tip 2: Keep It Simple
Simple designs stitch best.
Tip 3: Test Often
Testing saves time.
Tip 4: Learn from Errors
Each mistake helps you grow.
When to Get Expert Help
Some designs are complex.
When You Need Experts
-
Detailed artwork
-
Tight deadlines
-
Bulk orders
Digitizing Buddy has strong experience in making designs stitch-ready. Their team knows how to handle all types of designs.
How Digitizing Buddy Helps
Working with experts is a smart choice.
What They Offer
-
Clean stitch files
-
Fast delivery
-
Quality checks
Digitizing Buddy focuses on detail and accuracy. This helps you get better results every time.
Build Trust with Clean Work
Clean stitching builds trust.
Why It Matters
-
Clients notice quality
-
Good work brings repeat orders
-
Strong brand image
Always aim for neat results.
Where You Can Use Smooth Stitch Designs
Clean designs work on many items.
Common Uses
-
Shirts
-
Caps
-
Jackets
-
Bags
Each item needs smooth stitching.
Tips for Beginners
If you are new, start simple.
Easy Tips
Practice Daily
Small steps improve skill.
Use Simple Designs
Avoid complex work first.
Learn Basics
Strong basics give better work.
Final Thoughts
Getting smooth and professional stitch results is simple when you follow the right steps.
Start with a clean design.
Keep it simple.
Use the right stitch types.
Set correct machine settings.
Test before final stitching.
With time and practice, your work will improve.
And if you need expert help, Digitizing Buddy is always ready to give you clean and trusted results.
Keep learning. Keep stitching. Your designs will look better with every step.